
The estimated time for this is approximately 10 to 15 minutes.
Step 1: Turn off the power supply and unplug the power cable!
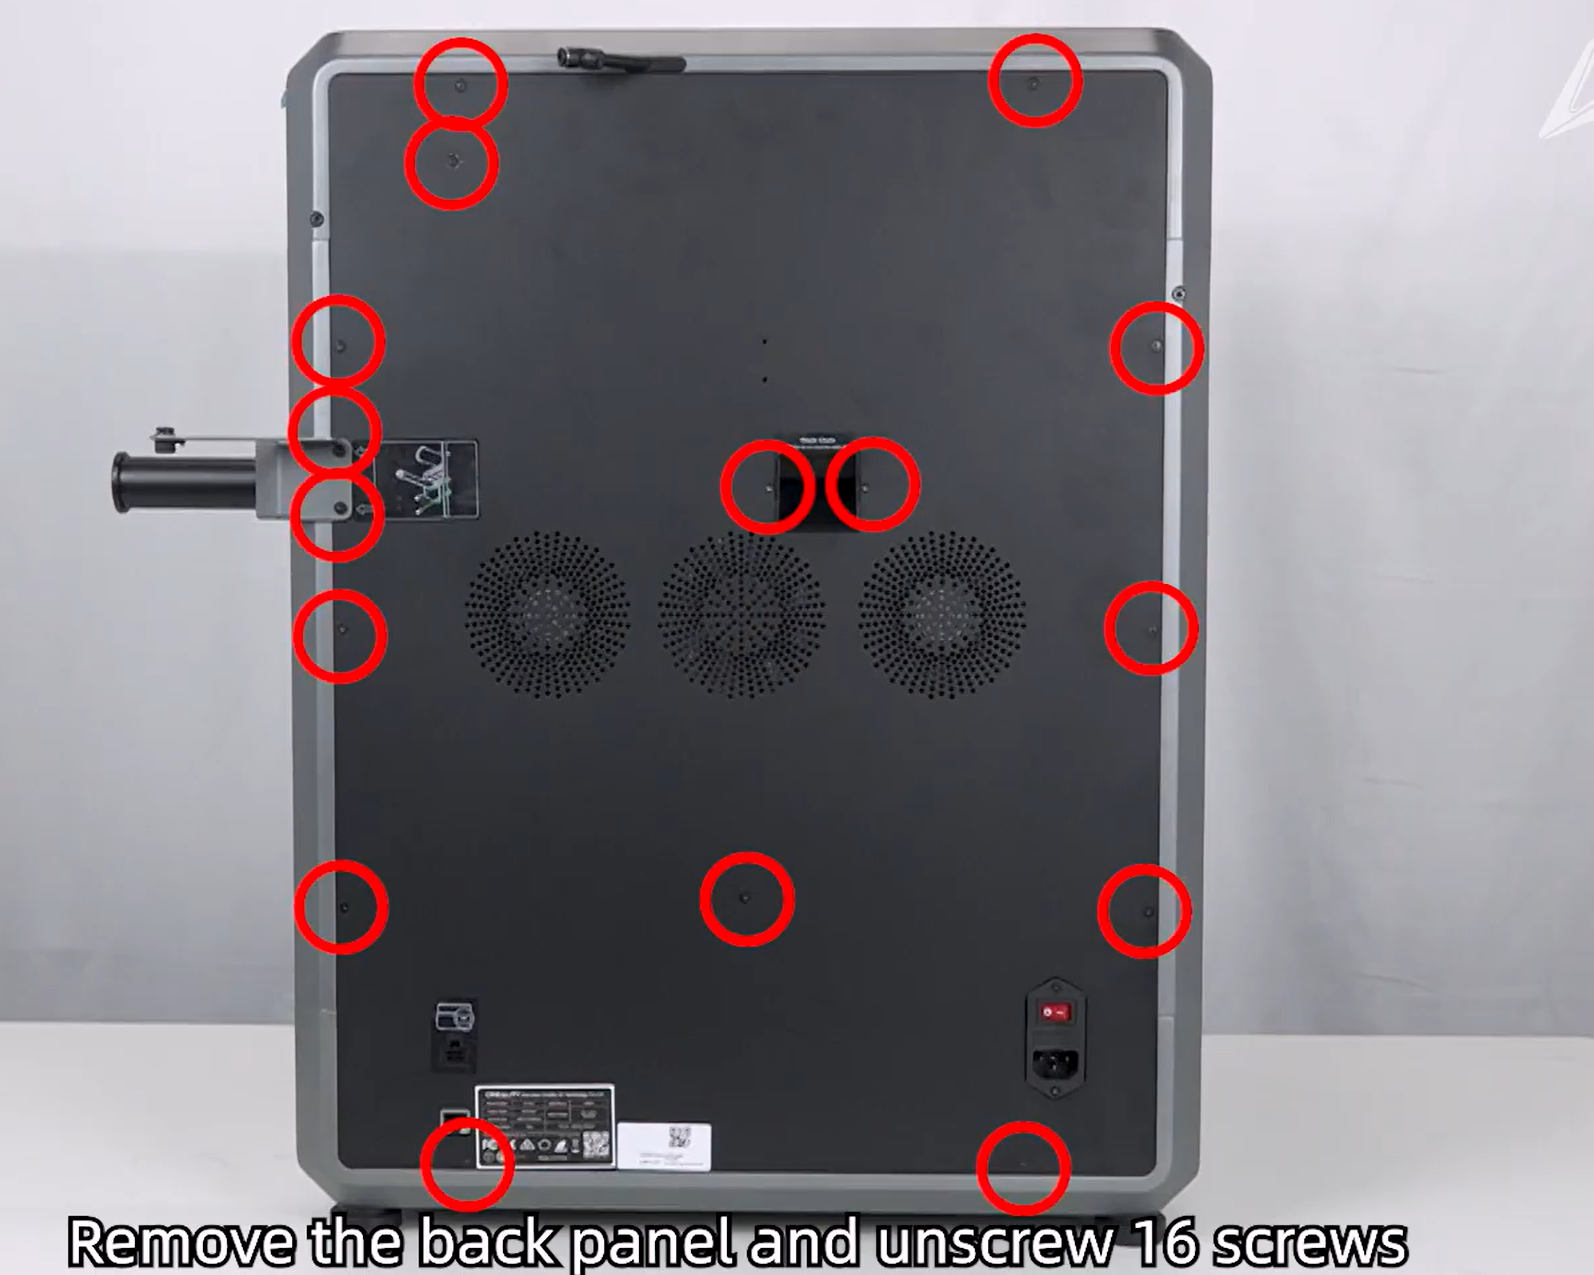
Step 2: Remove th abck panel!
Step 3: Identify which PCB you wish to replace!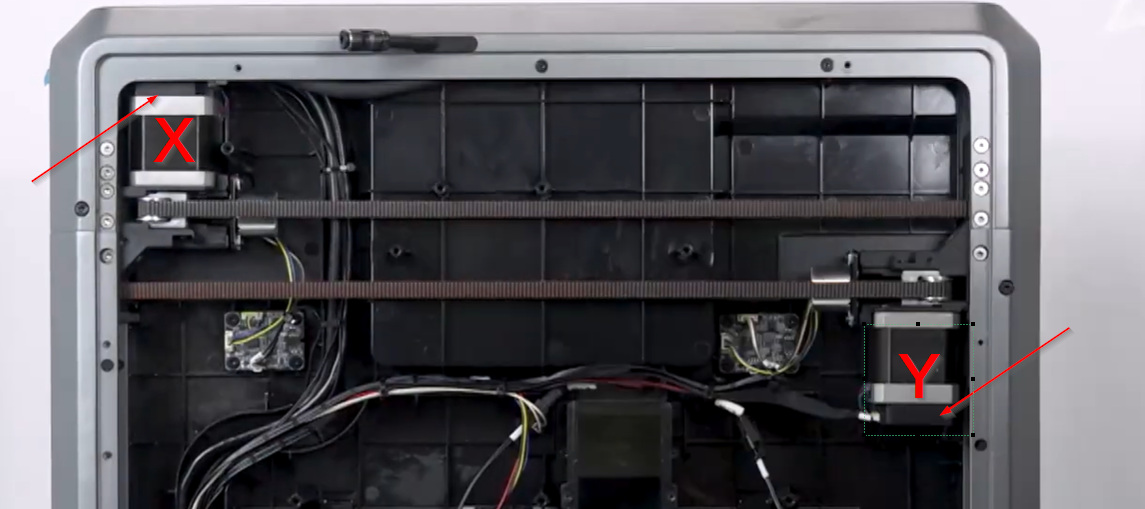
Step 4: At this point, you may continue with this guide if you wish to replace the PCB for the Y-motor and for x-motor servo PCB. Please follow this guide: https://3dprima.freshdesk.com/a/solutions/articles/6000281226?lang=en&portalId=6000018619. Note that you will need to remove take out the motor itself first!
Step 5: Remove the two M2 screws located at the base of the servo motor and disconnect the connector!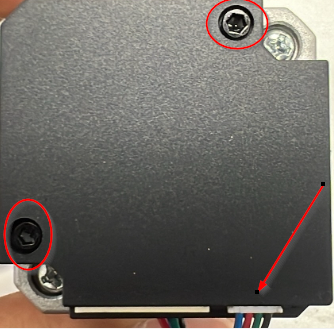
Step 6: Please unscrew the two M2 screws, remove the old servo PCB, and install the new one by reversing all steps.
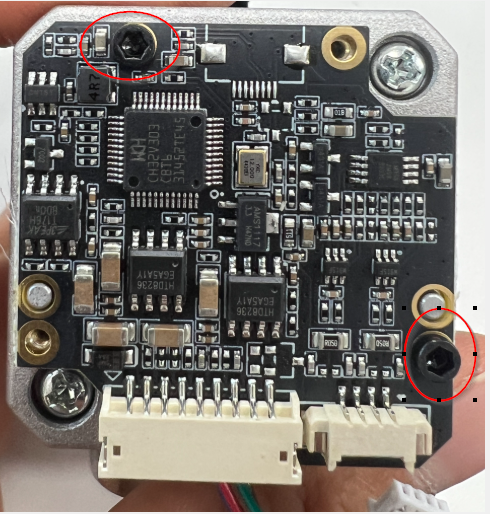
Important note: After installing the new servo PCB you need to recalibrate it in fluide. Please follow this guide to how to do it: https://wiki.creality.com/en/k2-flagship-series/k2-plus/calibrate-servo-motor